Self Adhesive Vinyl Floor and Wrap Guide
By Sarah Jenkins (BIID Associate Member | BA (Hons) Interior Architecture, Chelsea College of Arts) | November 11, 2026 | 15 min read
Editorial & Affiliate Disclosure: LUMAA HOME is reader-supported. Our editors independently research, test, and specify every material and product featured. When you purchase through retailer links on our site, we may earn an affiliate commission at no extra cost to you, in accordance with UK ASA guidelines.
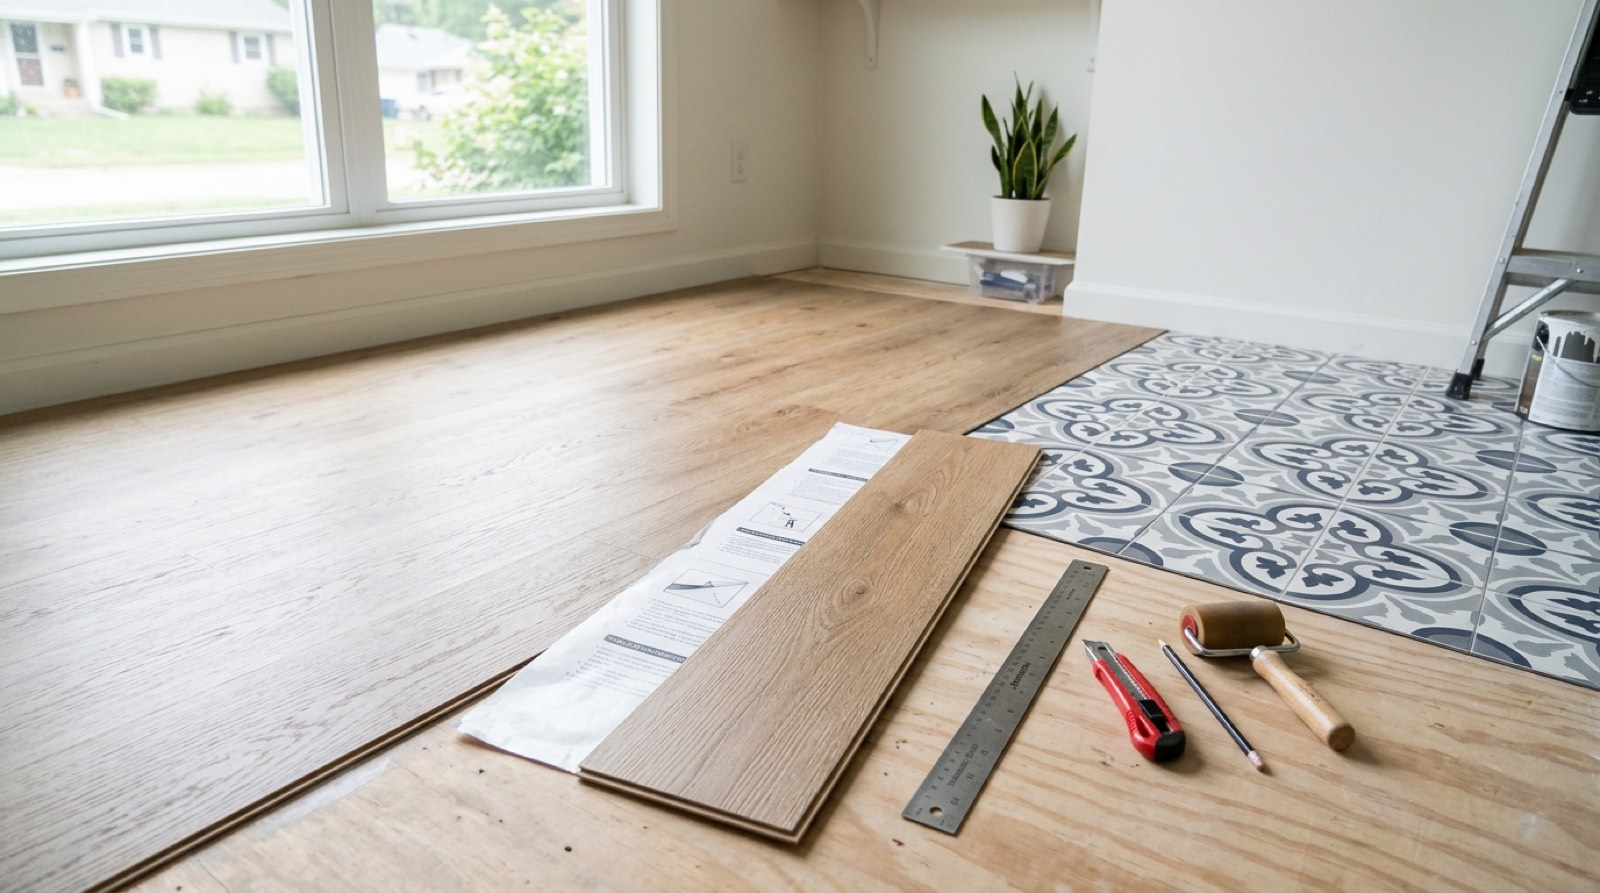
What Self Adhesive Vinyl Is and How the Three Formats Differ
Behind the decorative print, self adhesive vinyl is a flexible PVC sheet factory-coated with pressure-sensitive acrylic adhesive and protected by a waxy backing liner. Once peeled back and pressed firmly into place, that acrylic backing keys directly into microscopic pores across timber, primed concrete or clean cabinet melamine.
Homeowners generally pick between three distinct styles depending on whether they are covering floors or refacing cupboards. Mixing up thin furniture wrap with thick floor planks is an easy way to waste a weekend.
1. Peel-and-Stick Square Floor Tiles: Standard 305mm square vinyl tiles range from 1.2mm to 2.0mm thick. Printed terrazzo, encaustic tile motifs and Victorian checkerboard patterns give cloakrooms or porches a tiled finish without mixing cement grout.
2. Embossed Wood-Effect Vinyl Planks: Wood-look strips usually measure around 914mm long by 152mm wide with micro-bevelled edges and embossed grain ridges that catch room light naturally like oak floorboards.
3. Architectural Furniture and Worktop Film: Thinner sheets such as d-c-fix vinyl wrap measure roughly 0.1mm to 0.2mm thick. Their high flexibility lets DIYers wrap contoured Shaker doors, laminate benchtops and table corners cleanly using a hairdryer or mild heat gun.
Before opening any box, allow forty-eight hours of room acclimatisation. Stack opened packs flat inside the target room heated steadily between 18 and 22 degrees Celsius. Cold vinyl turns stiff as biscuit tin lid metal and loses initial adhesive tack before you even press it down.
| Vinyl Format | Typical Thickness | Wear Layer Spec | Backing Grid | Where It Works Best |
|---|---|---|---|---|
| Square Floor Tiles | 1.2mm – 2.0mm | 0.10mm – 0.25mm clear PVC | Peel-off arrow backing | Cloakrooms, porch entrances, utility floors |
| Wood-Look Floor Planks | 1.5mm – 2.5mm | 0.15mm – 0.30mm heavy wear | Split backing release sheet | Hallways, kitchens, living rooms, bedrooms |
| Furniture & Worktop Wrap | 0.1mm – 0.2mm | Printed matte or gloss PVC film | Printed 1cm cutting grid | Cupboard doors, laminate desks, shelves |
Tile Thickness, Wear Layers and Batch Number Checks
Two measurements decide whether self adhesive vinyl flooring survives eighteen months or ten years: overall plank thickness and the clear top wear layer.
Overall plank thickness runs from budget 1.2mm tiles up to sturdy 2.5mm vinyl planks. Thicker planks feel quieter underfoot and bridge tiny dust specks without showing ridges up through the surface.
Over the decorative colour film sits a transparent urethane or PVC wear layer that guards against grit, dragged chairs and dog claws. A thin 0.07mm to 0.10mm coating handles light guest-toilet footfall only. Everyday kitchens and bedrooms call for 0.15mm to 0.20mm, whereas gritty hallway entrances need a minimum 0.20mm to 0.30mm clear wear layer.
Calculate square metres carefully, then add ten percent extra stock to cover perimeter diagonal waste. Just before checking out, inspect the stamped production batch number printed on every cardboard sleeve. Boxes manufactured on different weeks often shift half a tone in shade—a subtle mismatch you only notice once the room light hits across joined seams.
- Store boxes flat in the heated fitting room for 24 to 48 hours of temperature acclimatisation
- Verify every pack carries the exact same dye-lot batch number before cutting a single plank
- Add 10 percent wastage allowance on square rooms or 15 percent on angled bay alcoves
- Equip yourself with chalk line string, steel straight edge, sharp snap-off blades and a 50kg floor roller
Preparing Your Subfloor So Self-Adhesive Tiles Never Lift
Nearly every case of peel and stick flooring peeling up in winter traces back to skipped prep rather than faulty glue. Thin PVC clings tightly to whatever profile sits beneath it. Leftover plaster lumps, dusty screed or springy board seams show clean through the vinyl within weeks.
Use the table below to match each UK surface to its proper preparation sequence before peeling a single liner.
| Existing Subfloor Type | Mandatory Overlay or Leveller | Primer / Sealer Step | Risk If Skipped |
|---|---|---|---|
| Timber Floorboards | 6mm SP101 or WBP flooring plywood | Acrylic subfloor primer (1 coat) | Seasonal wood movement splits seams open |
| Solid Concrete / Screed | 3mm latex smoothing compound + DPM if damp | Neat or 1:1 acrylic primer sealer | Porous dust dries adhesive out in weeks |
| Old Ceramic Tiles | Sugar soap scrub + feather-finish grout skim | High-grab universal floor primer | Vinyl sinks into old sunken grout grid |
| Laminate Cupboard Doors | Strip hinges, wash twice with sugar soap | Isopropyl alcohol wipe before wrapping | Cooking oil prevents edge adhesion |
Timber Floorboards: Fitting 6mm SP101 Plywood First
Never apply self adhesive vinyl tiles straight onto raw suspended timber floorboards. Pine boards swell during wet winters and shrink back over hot radiators, dragging glued vinyl seams apart until dirt collects in black hairline gaps.
Screw down a rigid timber overlay made from flooring-grade 6mm SP101 plywood (or 6mm to 9mm exterior WBP ply) stamped smooth and knot-free. Avoid rough builder's shuttering ply—knots leave soft hollows and stray resin bleeds discolour light grey tiles from underneath.
Lay boards perpendicular across existing floorboards with staggered brick-bond joints so four corners never converge together. Drive ringed shank flooring nails or countersunk 25mm wood screws every 150mm across board centres and every 100mm around perimeter seams. Skim recessed screw heads and panel joints smooth using rapid feather-finish smoothing compound, sand dead flat once dry, vacuum thoroughly then roll a single coat of acrylic floor primer.
Concrete Subfloors: Damp Testing, Latex Levelling and Primers
Concrete and sand-cement screeds must sit bone dry and dust-free before installing vinyl planks. Tape a plastic hygrometer moisture box down onto new screeds—internal relative humidity must read safely below 75 percent. Trapped rising moisture turns acrylic adhesive into milky paste, loosening whole rows underfoot. Where damp persists, brush down two coats of surface damp-proof membrane before levelling.
Pour a 3mm cap of latex self-levelling compound over rough trowel marks or pitting. Once hard, sweep and vacuum every speck of grey cement dust off the slab, then coat the surface using a paint roller soaked in acrylic floor primer. Unprimed concrete drinks liquid from adhesive instantly; cured primer turns the floor slightly tacky so vinyl bonds tight right to the walls.
Laying Over Existing Ceramic Floor Tiles
Solid glazed floor tiles can stay in place provided none rock underfoot or sound hollow when tapped with a screwdriver handle. Scrub years of waxy floor polish off with warm water mixed with concentrated sugar soap degreaser, then rinse clean.
Mix small batches of rapid-setting feather-finish floor patch and pull a steel plasterer's trowel tight across every grout joint until flush with the ceramic glaze. Skipped grout lines slowly press up into vinyl after heavy summer heating, outlining your old tile squares permanently across the new floor.
Step-by-Step Guide to Laying Self Adhesive Vinyl Floor Tiles
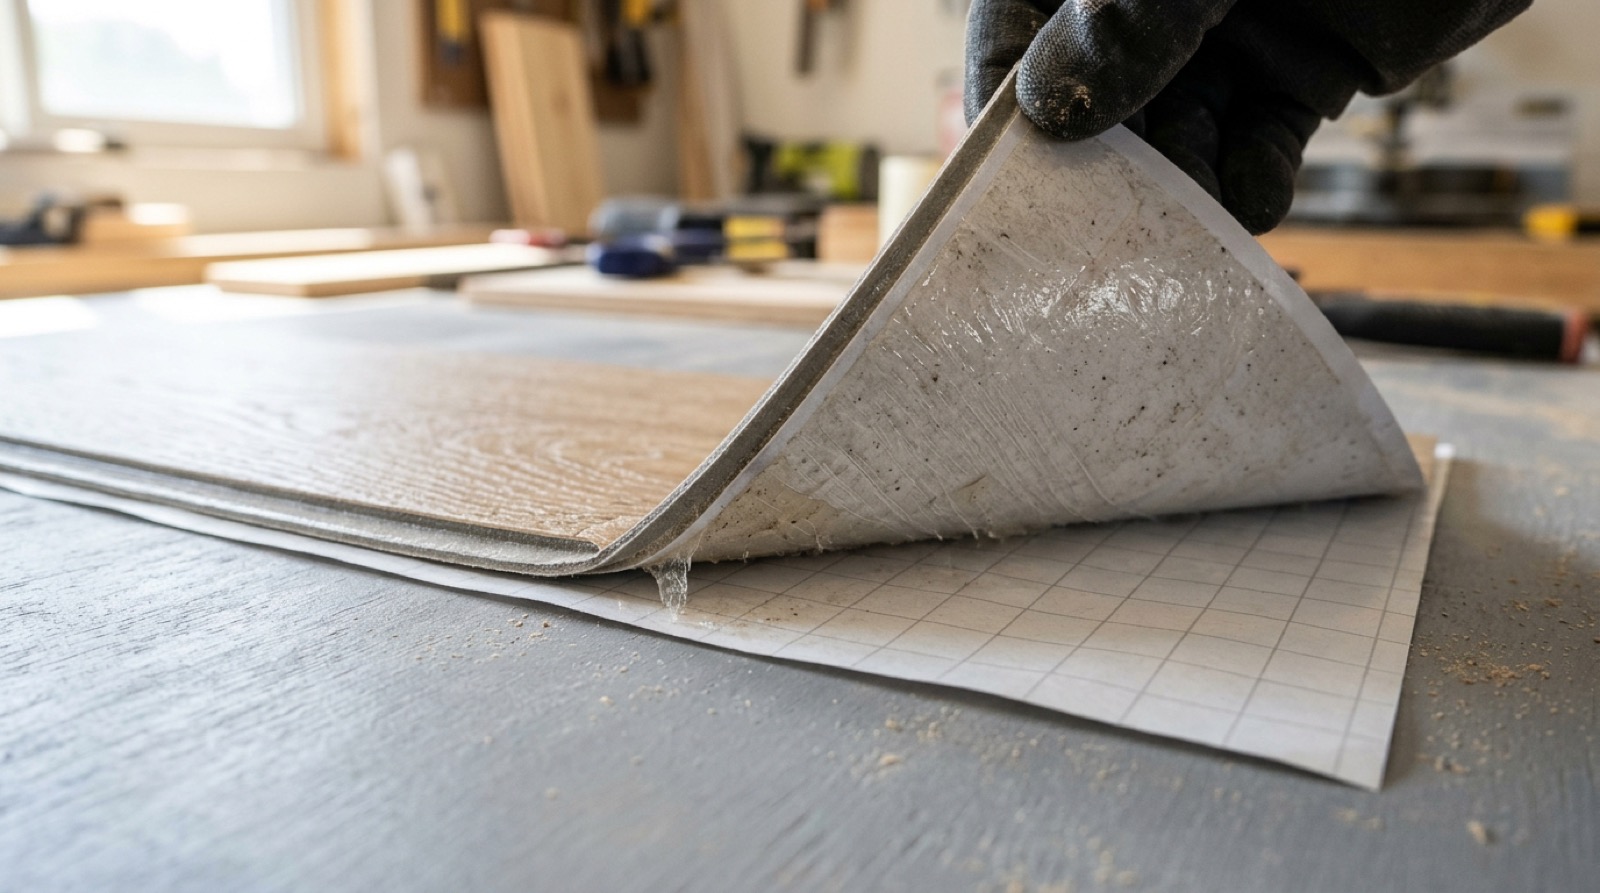
Follow these practical fitting steps on installation day so rows finish straight without skinny sliver cuts at opposite skirtings:
1. Snap a Central Chalk Line Cross: UK walls run out of true more often than homeowners expect. Never butt full starting rows directly off one wall. Measure opposite wall midpoints and snap two perpendicular builder's chalk lines crossing cleanly at the centre of the room.
2. Dry Lay Before Peeling Backing: Lay loose unpeeled tiles outward along your chalk line cross toward both walls. Whenever a final perimeter border piece lands under 50mm wide, nudge your main chalk datum back by half a tile width so both opposite wall edges hold balanced wide cuts.
3. Work Outward in a Pyramid: Peel back the release paper on your first tile without touching the adhesive with greasy fingers. Seat two edges tight onto the chalk cross and smooth firmly outward from the tile centre so no air pocket hides underneath. Butt neighbouring planks flush without trapping ridges.
4. Score, Snap and Leave Expansion Margin: Cut border tiles using the stack-and-scribe trick—place a spare tile flush over your last laid tile, rest a marker tile tightly against the skirting board, then score deeply along its edge with a fresh utility blade and steel straight edge. Snap cleanly downward across the cut.
Keep a narrow 3mm expansion gap clear along skirting boards and undercut door architraves. Sunny conservatory doors warm floors quickly, meaning wedging cold tiles dead tight against skirtings makes seams peak upward on hot July afternoons. Tuck perimeter edges neatly under undercut door frames or conceal the shadow gap beneath matching Scotia beading.
5. Roll With a 50kg Floor Roller: Stamping tiles down by foot misses corners. Push a hired 50kg steel floor roller steadily north-south then east-west across the finished floor. High weighted pressure forces pressure-sensitive glue deep into primed subfloor pores. Across wet back doorways or kitchen sink zones, lightly roll tacky pressure tackifier adhesive onto the primer beforehand to anchor high-pivot spots.
Solving Lifting Corners, Heating Limits and Subfloor Bounces
When handling edge curl, radiant heat or acoustics around self adhesive vinyl, three rules save floors from premature tearing.
Fixing Lifting Corners: Warm lifted vinyl gently using an ordinary household hairdryer until soft, lift carefully, work a tiny smear of contact vinyl adhesive beneath the tip using a flat toothpick, press back hard then weigh it down overnight under stacked cookbooks.
Underfloor Heating Temperature Limits: Most self-stick vinyl flooring works fine over piped or electric radiant systems provided surface temperature stays strictly under 27 degrees Celsius. Excessive heat liquefies acrylic adhesive underneath planks, allowing walking shoes to skid planks out of alignment.
Never Use Cushioned Foam Underlays: Laying peel-and-stick tiles on cushioned springy underlays bends tile corners downward under stiletto heels or chair legs, snapping brittle seam edges within weeks. Where concrete floors demand cushioned acoustic reduction, compare thicker click-lock luxury vinyl tile (LVT) planks or heavy loose lay vinyl sheets instead.
How to Wrap Kitchen Cupboards and Worktops Without Bubbles
Self adhesive vinyl wrap delivers fast, economical cupboard refacing when structural cabinets remain sound. Before starting any kitchen makeover, inspect door edge condition and hinge alignment using our guide on choosing and fitting modern modular kitchen cabinets or verify your underlying cabinet box strength in our kitchen unit carcasses trade manual.
1. Strip Doors and Degrease Twice: Unclip cupboard doors off hinges, remove handles and lay doors flat across trestles. Airborne pan steam coats doors with sticky invisible film that stops vinyl holding. Wash faces thoroughly with sugar soap degreaser, rinse wet, let dry, then give final corners a quick wipe using isopropyl alcohol.
2. Choose Dry Method (Doors) vs Wet Application Method (Worktops): On narrow doors, cut wrap 5cm oversize using the printed backing grid, peel 10cm of backing paper flat across one end, anchor squarely, then drive out air smoothly toward outer borders using a felt-edge squeegee. On wide kitchen benchtops where misplacing dry glue instantly ruins expensive long runs, try the wet application method: lightly mist clean laminate with plain water carrying one tiny drop of washing-up liquid, float the sheet straight into position, then drive water and air bubbles firmly out toward edges with a hard squeegee.
3. Trim Recessed Shaker Profiles and Post-Heat Edges: Wrap recessed Shaker door centres first before trimming neatly inside inner rail shadows, then cover outer stiles separately with clean 45-degree mitred corner cuts. Warm tight corners carefully using a hairdryer or gentle heat gun set around 80 degrees Celsius so softened vinyl folds smooth without pleats. Once smoothed down, finish by gently warming folded return edges briefly—heating relaxed memory keeps back edges locked flat permanently. Prick stubborn pin-sized bubbles lightly using a fine sewing needle before rubbing flat with your thumb.
Wait a full twenty-four hours before wiping new surfaces or reattaching handles. Remember too that standard PVC film carries an approximate 75 degrees Celsius peak temperature rating. Resting boiling saucepans directly off induction hobs melts vinyl instantly, so keep solid wooden boards or steel trivets beside cookers—see our comparison on selecting stone or timber kitchen worktops for bare heat-resistant alternatives. Finish wall splashbacks cleanly by reading our real-world test on stick on wall tiles in kitchens and bathrooms.
Waterproofing Bathrooms and Kitchen Sink Zones
Solid PVC sheets shrug off routine floor dampness without trouble, yet standing puddles around baths, shower trays or overflowing dog bowls slowly sneak downward between fine butt seams. Once water penetrates underneath, glue loses grip permanently and chipboard subfloors blow.
Before fitting tiles inside compact cloakrooms or upstairs bathrooms, verify that floor ply stays sealed tight. Wait a strict 48 hours after finishing installation before running wet mops across seams so initial pressure bonds cure properly. Seal the entire room boundary—skirting edges, bath panels, toilet plinths and kitchen kickboards—with neat colour-matched sanitary silicone sealant so bath splashes bead safely on top instead of creeping underneath. Keep self-stick tiles outside continuous wetroom floor trays; wetroom showers need welded commercial vinyl sheets over tanked drains.
Removing Old Self Adhesive Vinyl Cleanly Without Ruining Subfloors
Tenants and landlords love peel-and-stick tiles because tired floors lift cleanly at tenancy end without chipping away original quarry tiles or sanding soft pine floorboards.
Never yank freezing cold tiles sharply upward—brittle PVC fractures into sharp slivers while stubborn yellow glue stays cemented onto the floor. Work methodically across one small square at a time using a hairdryer held ten centimetres off the tile for twenty to thirty seconds. Softened acrylic adhesive yields readily when pulled back steadily low at a forty-five-degree angle.
Whenever faint tacky patches remain on oak boards or melamine cupboard doors, dampen clean microfibre rags with isopropyl alcohol or citrus-based adhesive remover. Leave solvent sitting three minutes to soften polymer chains, scrape gently using blunt plastic putty knives so underlying timber never scores, then wipe surfaces clear with soapy warm water.
- Run continuous sanitary silicone perimeter beads along bath edges, skirtings and kitchen sink cut-outs
- Avoid wet-mopping freshly laid floors for at least 48 hours while acrylic bonds achieve final grab
- Never stand boiling cookware straight onto wrapped worktops above 75 degrees Celsius heat ratings
- Warm old tiles thoroughly before peeling at 45 degrees and clean lingering tack using isopropyl alcohol
Frequently Asked Questions
Can I stick self adhesive vinyl floor tiles directly onto wooden floorboards?
No. Suspended timber floorboards shrink and swell with indoor heating and damp air, dragging tile seams apart into dirt-trapping gaps. Always screw down 6mm SP101 or WBP flooring plywood at 150mm centres, fill screw heads with feather-finish compound and seal with acrylic primer first.
Do I really need to prime concrete or plywood before laying peel-and-stick vinyl?
Yes. Bare concrete, cement screed and unsealed plywood rapidly drink moisture out of pressure-sensitive tile glue, leaving corners curled within weeks. Applying one even coat of acrylic subfloor primer locks down fine surface dust and gives adhesive a clean tacky key.
What temperature limit applies to vinyl wrapped kitchen worktops?
Quality architectural vinyl films such as d-c-fix typically tolerate short heat up to around 75 degrees Celsius, handling hot mugs and plates safely. Setting boiling saucepans or casserole dishes directly from the oven or hob onto wrapped surfaces melts the PVC film, so trivets remain essential.
How long should I wait before mopping new self adhesive vinyl flooring?
Allow 48 hours (up to 72 hours in cool rooms) before wet mopping new floors. After pushing tiles tight using a 50kg floor roller and running waterproof silicone seals around skirtings, waiting two full days lets acrylic bonds set solidly across seam lines.
Can self adhesive vinyl flooring be used over underfloor heating?
Yes, provided the heating system keeps floor surface temperatures strictly below 27 degrees Celsius and room acclimatisation sits around 18–22 degrees Celsius during fitting. Switch heating off 24 hours before laying tiles, then bring temperatures back up gradually a few degrees per day.
How do you apply d-c-fix wrap onto large kitchen worktops without trapping air bubbles?
Use the wet application method on clean sealed worktops: lightly mist the degreased laminate with water holding one drop of washing-up liquid so you can slide the vinyl film into square alignment before driving water and bubbles out toward edges with a felt squeegee.