How to Make a Roman Blind with Lining for Any Window
By Sarah Jenkins (BIID Associate Member | BA (Hons) Interior Architecture, Chelsea College of Arts) | October 26, 2026 | 11 min read
Editorial & Affiliate Disclosure: LUMAA HOME is reader-supported. Our editors independently research, test, and specify every material and product featured. When you purchase through retailer links on our site, we may earn an affiliate commission at no extra cost to you, in accordance with UK ASA guidelines.
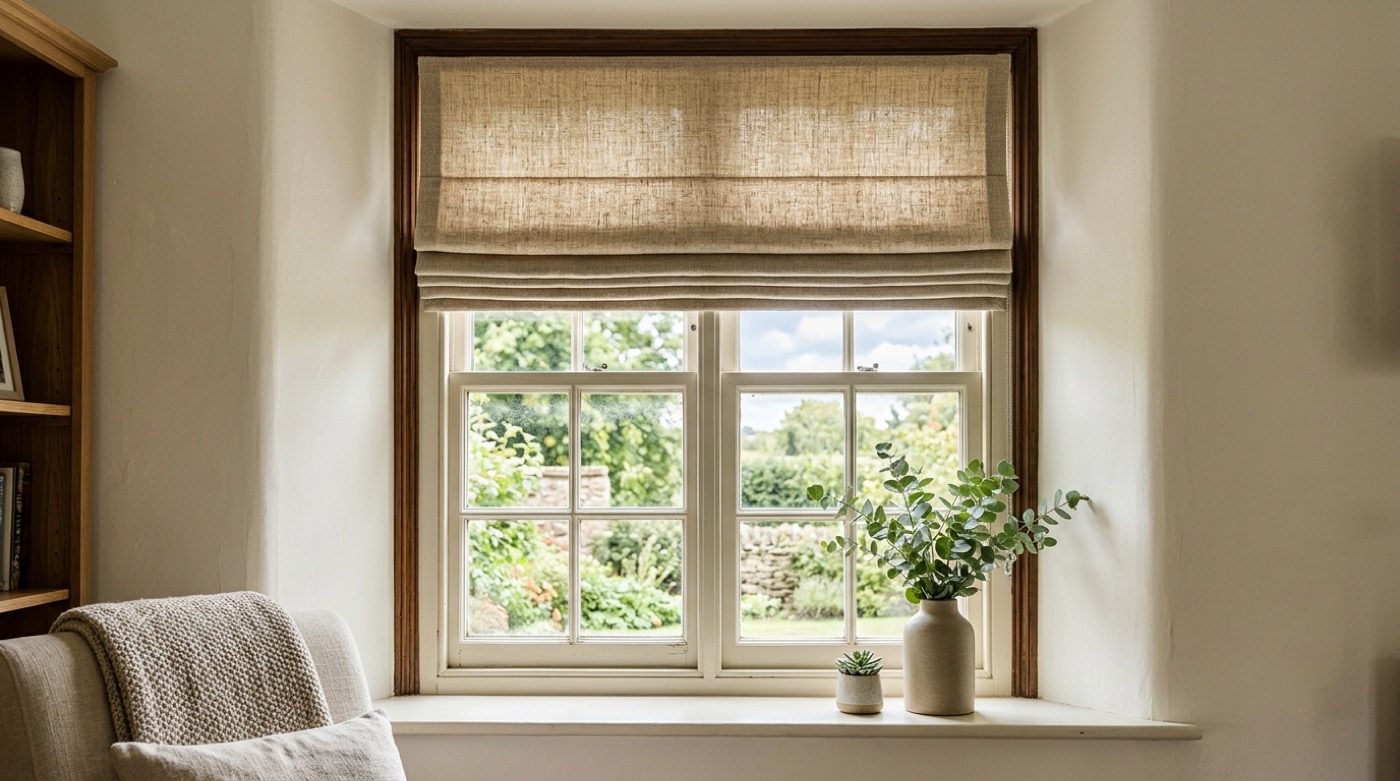
What Makes a Roman Blind Look Professional Rather Than Homemade
Walk into any luxury interior showroom in London or Edinburgh and you will notice that high-end Roman blinds share three specific traits. They hang perfectly flat without puckering along the vertical side seams, their horizontal pleats stack in razor-sharp rows when raised and no stitching lines or rod shadows show through on the front fabric.
Achieving that level of finish at home is entirely possible once you understand the basic mechanics of how the textile behaves. Commercial made-to-measure blinds from retailers like John Lewis or Hillarys often cost between three hundred and five hundred pounds per window. When you buy your own curtain fabric, thermal blackout lining, timber batten and brass screw eyelets, the total material cost drops to roughly forty to seventy pounds per window.
Learning how to make a roman blind gives you total control over fabric weights, pattern matching and room light control. The construction relies on straight machine seams, accurate measuring with a metal rule and thorough pressing with a steam iron at every stage of the build.
The Three Hallmarks of Quality Drapery
A professional window dressing hangs plumb and level under its own weight. The edges must stay dead vertical without bowing inward while the lower hem must rest completely horizontal across your window sill.
Inferior blinds often reveal their flaws through exposed stitch lines on the face cloth or uneven gathering when pulled. By securing your rod pocket tape directly to the lining cloth rather than sewing through the face fabric, you maintain an unbroken, tailored front surface that catches natural daylight evenly across the room.
Tools and Work Area Needed for Straight Seams
You do not need an industrial textile workshop to assemble a Roman blind, but you do need enough flat surface area to spread out your cloth single-layer. A large dining table, a craft workbench or a swept hard floor allows you to align fabric grains accurately.
Essential hand tools include a heavy metal safety ruler, a carpenter square to verify ninety-degree corners, sharp dressmaking shears, tailor chalk, a domestic steam iron and an accurate tape measure. Using cheap plastic school rulers or cutting fabric on a squishy carpet causes fabric layers to shift, resulting in crooked hems that pull sideways when hung.
Choosing the Right Cloth and Linings for Flat Folds
The physical drape of your finished blind depends heavily on fabric choice. A blind made from slippery, thin synthetic cloth will twist and ripple, while heavy upholstery fabrics create a thick, clumsy stack that blocks daylight when raised.
Selecting a fabric with balanced body ensures that your horizontal pleats fall into crisp, clean lines without sagging between the vertical cord columns. In UK homes, considering room humidity, draught exposure and solar intensity helps you pick materials that remain stable across different seasons without shrinking or warping.
Medium-Weight Cottons and Linen Unions
Medium-weight woven fabrics offer the best balance of structure and pliability. Linen unions, cotton twill, wool flannel and traditional ticking stripes hold crisp creases when pressed with an iron, yet fall into relaxed horizontal folds as you raise and lower the blind. Avoid stretchy jersey fabrics, lightweight silks and loose weaves that pull out of square under the weight of metal rods and cords.
When choosing textiles for living rooms or bedrooms, coordinating your fabric tone with choosing authentic heritage paint colours on the surrounding woodwork and walls creates a cohesive, tailored room scheme. Natural linen weaves diffuse morning light warmly while dark wools or dyed twills bring depth to north-facing spaces.
Thermal Blackout vs Standard Cotton Linings
Linings are just as important as the face fabric. Knowing how to make a lined roman blind using three-pass blackout lining provides major practical benefits for UK homes. Blackout backing gives lightweight face fabrics extra body, shields delicate dyes from sun fading, stops cold winter drafts around single-glazed sash windows and prevents horizontal dowel rods from casting dark shadow bars across the window when the sun shines directly against the glass.
Standard cotton sateen lining works well in kitchens or communal hallways where gentle light filtration is desirable and room insulation is less critical. When sewing how to make a roman blind with lining, interlocking the lining to the face cloth along the side borders prevents the two layers from separating or billowing whenever a window is opened.
Getting Window Dimensions Right for British Window Frames
Taking accurate measurements is the foundation of any successful window treatment. Older British brick and stone properties settle over the decades, which means timber sash windows and plastered reveals are rarely square.
Before ordering your cloth, decide whether your blind will sit inside the plaster reveal or mount on the wall face outside the recess. A tape measure pulled at an angle or a single measurement taken at the bottom can lead to an ill-fitting blind that scrapes against plasterwork or lets daylight leak around the borders.
Inside Recess Measuring and Sizing Tolerances
An inside recess fitting positions the headrail inside the window reveal, creating a neat tailored look that leaves your window sill clear for lamps and decorative objects.
Measure the horizontal width across the top, middle and bottom of the opening. Note down the smallest measurement of the three and deduct exactly one centimetre. This five-millimetre clearance on each side stops the side hems from dragging against uneven plaster as the blind moves up and down. For the drop, measure from the lintel down to the window sill in three places, writing down the longest measurement.
Outside Recess Overlaps and Batten Placement
Outside recess fittings mount on the wall above the window, which is ideal if your window frame has handles that stick out or if the internal plasterwork is badly damaged.
Measure the window opening and add ten centimetres to the width so the fabric overlaps the architrave by five centimetres on both sides to block light gaps. Add fifteen centimetres above the top frame for your mounting batten so the stacked folds do not block daylight when the blind is pulled up.
Calculating Pleat Folds and Rod Spacing Without Guesswork
Working out pleat geometry ensures that your blind folds into neat, even panels rather than an awkward bunch of uneven fabric. The spacing between horizontal rods governs how high each fold stacks and how the blind appears from both inside the room and outside on the street.
For standard domestic windows, finished fold depths typically range between eighteen and twenty-four centimetres. Folds shallower than eighteen centimetres require too many horizontal rods and look cluttered, while folds deeper than twenty-four centimetres create an excessively thick stack that hangs down into the glass area.
Standard Flat Stack Versus Waterfall Cascade
You can arrange your pleats in two distinct styles: a standard flat stack or a waterfall cascade. In a standard flat stack, every fold is the exact same depth, gathering directly behind one another beneath the mounting batten.
In a waterfall cascade, each successive fold drops about two centimetres lower than the one above it, creating an attractive stepped display that displays patterned textiles. This stepped look gives traditional interiors a softer, more luxurious profile while showing off linen prints or embroidery.
Working Out Exact Dowel Line Positions
To calculate your rod positions, take your finished drop measurement. Deduct half of a standard fold depth for the bottom base section, which tucks behind the first gathered pleat when raised. Divide the remaining length by an odd number, usually three, five or seven, to determine the exact distance between dowel pockets.
On a blind with a 130cm drop, deducting an 11cm bottom half-section leaves 119cm. Dividing that by five gives five equal sections of 23.8cm. Mark these horizontal lines onto the back of your lining using tailor chalk and a long straight edge.
Cutting, Seaming and Stitching the Blind
Careful preparation before sewing guarantees that your blind hangs square and your side edges stay crisp. Following clear how to make a roman blind instructions step by step stops you from making cutting errors that ruin expensive fabric.
Spread your main face fabric single-layer across your cutting surface. Check every corner with a carpenter square to ensure your cuts are dead straight. Calculate your cutting dimensions by adding five centimetres on each side for double-turned side hems, ten centimetres at the bottom for the weight bar hem and five centimetres at the top edge for the Velcro headrail attachment. Cut your lining five centimetres narrower than the cut face fabric and ten centimetres shorter on the drop.
Preventing Lining Creep on Side Hems
Place the face fabric and lining with their decorative faces together and match the raw side edges. Sew down both long side seams with a 1.5cm seam allowance, then turn the stitched fabric tube right side out.
Press both side edges flat with a steam iron, rolling the face fabric 2.5 centimetres around to the reverse on both sides. This 2.5cm wrap creates a clean border that stops lining cloth from creeping into view from the front. Fold a double 5cm hem along the bottom edge, press firmly and stitch across to form the weight bar pocket.
Applying Pre-Woven Rod Pocket Tape
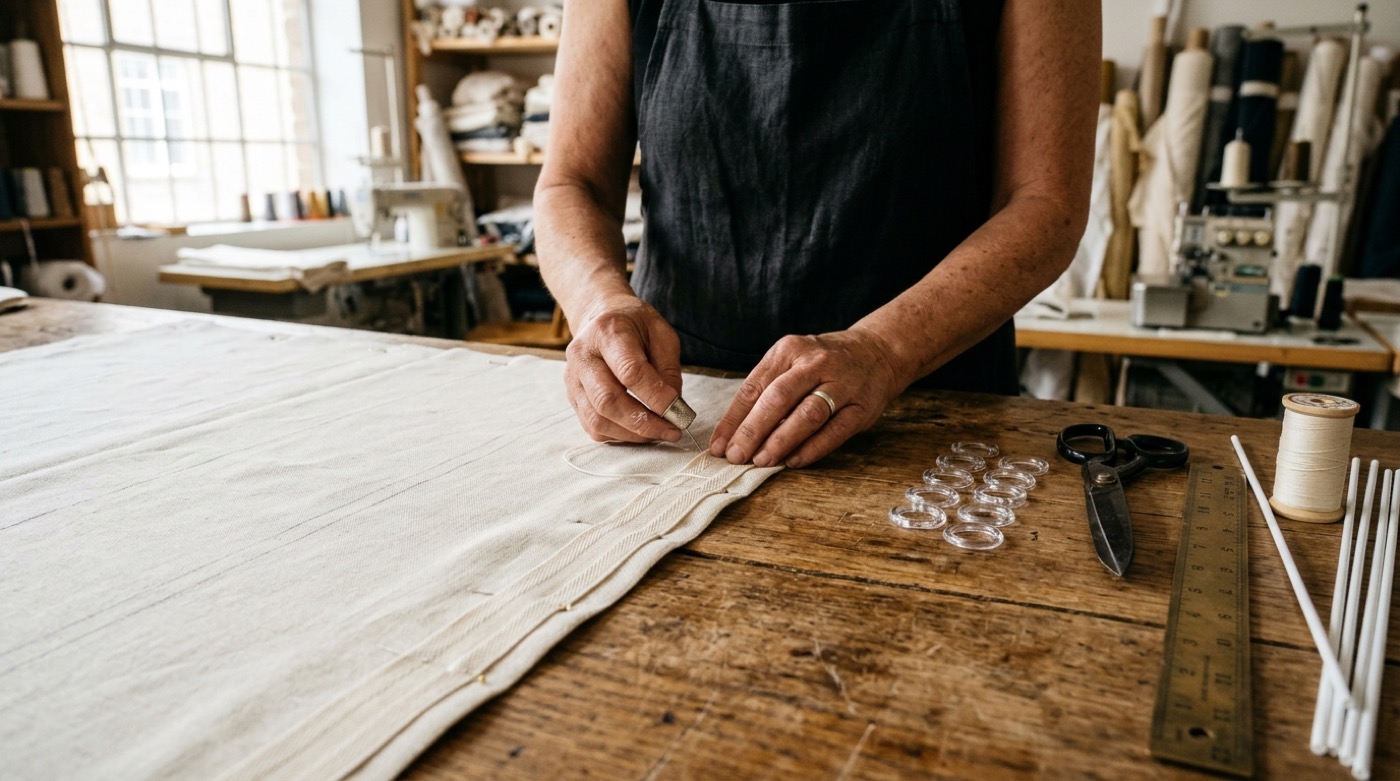
To keep how to make a roman blind easy on yourself, skip hand-stitched dowel pockets and use pre-woven Roman blind rod pocket tape. This tape has a built-in channel for your dowel and pre-woven loops for the lift cords.
Pin the tape across each chalk line on the lining, turn the cut ends under by one centimetre and machine stitch along both outer edges with matching thread. Ensure your sewing machine needle catches only the lining fabric so that the front face cloth stays entirely stitch-free.
Dowels, Weight Bars and Cord Mechanics
The internal rods and rings provide the solid structure that lifts the fabric smoothly into crisp pleats. Without rigid horizontal supports, Roman blind fabric simply gathers into a messy drape rather than concertinaing in controlled, geometric sections.
Selecting hardware matched to the width and weight of your window treatment prevents bowing in the centre and keeps the lower hem taut. Balancing the weight between the lower aluminium or timber bar and the flexible fiberglass ribs ensures effortless lifting without excessive friction on the guide cords.
Selecting Dowels and the Bottom Weight Bar
Use four-millimetre fibreglass rods or smooth wooden dowels inside the horizontal tape pockets. Fibreglass rods are lightweight, flexible and do not bow over time. Cut each rod two centimetres shorter than the finished blind width so the ends do not push through your side seams then stitch the pocket ends closed with a quick needle and thread.
A Roman blind relies on gravitational pull to fall shut. If your bottom edge is too light, the blind will stick halfway down the window when you release the cord. Slide a flat aluminium bar or a 25mm pine batten into the bottom hem channel. The downward weight of this base bar pulls the blind straight and keeps the bottom edge looking tailored.
Cord Ring Alignment and Spacing
Stitch small clear polycarbonate or brass cord rings onto the rod tape at each fold line. Position the outer ring columns five centimetres in from the side hems, then space intermediate rings evenly across the width between twenty-five and thirty-five centimetres apart.
Ensure that all rings across each horizontal rod line up into true vertical columns, as crooked rings cause the blind to lift unevenly. Using strong polyester thread stitched through both the tape and the rod pocket secures each ring firmly against years of continuous cord friction.
Hanging the Blind and Keeping Cords Child-Safe
Mounting the blind securely and rigging the lift cords requires basic hand tools and simple timber. A sturdy mounting header holds the fabric parallel to the ceiling lintel, resisting the downward pull of heavy winter fabrics.
Properly anchored headrails support the full weight of heavy blackout fabrics and withstand daily cord operation without pulling away from the masonry. Safety considerations around pull cords must be factored in during the initial headrail installation rather than treated as an afterthought.
Fabric-Covered Timber Batten Headrail
Cut a piece of planed pine batten measuring 25mm thick by 50mm deep to the exact finished width of your blind. Wrap the timber in a spare strip of your face fabric, stapling it neatly along the back. Staple the rough hook side of stick-on Velcro across the front vertical face of the batten.
Sew the soft loop side of the Velcro along the top edge of your blind, then press the blind onto the batten. Screw brass eyelets into the underside of the timber, lining each eyelet directly above your vertical columns of rings.
Cord Threading and Wall Cleat Installation
Cut lengths of strong 1.5mm braided nylon blind cord. Tie the end of each cord securely to the bottom ring of each column. Thread the cord straight up through every ring in that row, through the eyelet on the batten then pull all cords across to the side where you want to operate the blind.
Child safety is a legal and practical priority when stringing window blinds. Dangling cord loops present a serious strangulation hazard to young children and pets. Install a sturdy two-screw safety cleat on the wall at least 150 centimetres above floor level. Always wrap operating cords securely around this cleat in a figure-eight pattern whenever you raise the blind, or fit breakaway cord connectors designed to pull apart under sudden weight.
Training the Fabric and Solving Common Faults
Newly finished Roman blinds need mechanical conditioning so the textile learns where to fold. Fresh cotton and linen fabrics retain factory sizing and natural stiffness that can resist neat creasing during initial use.
Taking time to set the pleats immediately after installation ensures that the fabric folds into crisp horizontal layers rather than bunching irregularly. Addressing minor cord imbalances or dowel misalignments during the first week guarantees smooth, trouble-free operation for years to come.
The Forty-Eight Hour Ribbon Trick
When you first hang the blind, pull the cords to raise it fully to the top of the window frame. Guide each horizontal fold forward with your hands, arranging the pleats into uniform cascading layers. Tie two lengths of wide cotton tape or soft ribbon loosely around the gathered stack.
Leave the blind tied up for forty-eight hours. This resting period compresses the textile fibers into sharp fold memory so the fabric stacks and drops cleanly on every subsequent pull.
Correcting Sloping Ascent and Dowel Binding
If your blind ascends unevenly or tilts to one side, check cord tension first. Release all cords from the master knot or pull acorn, lower the blind flat to the sill and re-tension each vertical cord line with equal pull before securing them again.
If horizontal dowels catch during ascent, verify that rod lengths do not exceed the distance between side seams then inspect whether cord eyelets on the headrail sit directly perpendicular to their corresponding ring columns.
Frequently Asked Questions
How do you calculate fabric requirements for a Roman blind?
Measure the finished window recess dimensions. Add 10cm to the width for double side hems (5cm per side) and add 15cm to the drop for the bottom weight hem (10cm) and top Velcro header (5cm). Standard UK window widths under 130cm require a single standard fabric width of 137cm to 140cm without vertical joining seams.
What is the best fabric for making a Roman blind?
Medium-weight natural fabrics such as linen unions, cotton twill and wool flannel provide the best balance of stability and drape. Highly elastic knits, lightweight silks and heavy upholstery velvets should be avoided because they stretch or crowd the headrail stack.
Why should you use blackout lining on Roman blinds?
Thermal blackout lining insulates against cold window glass, blocks external light completely, adds structural weight to lighter face fabrics and prevents horizontal dowel rods from casting visible dark silhouettes when sunlight hits the window.
What size dowel rods are standard for Roman blinds?
Four-millimetre fibreglass rods or smooth wooden dowels are standard. Cut them 2cm shorter than the finished blind width so they do not wear through the side hems over time.
What UK safety precautions are necessary for blind cords?
All blind cords must either feature breakaway connectors or be secured to a wall-mounted cleat fixed at least 150cm above floor level to keep loose cords out of reach of young children and pets.
How do you wash a handmade lined Roman blind?
Untie the lift cords, slide out all horizontal dowel rods and remove the bottom weight bar. Professional dry cleaning is recommended for linen and wool blinds to avoid shrinkage. Machine-washable cottons can be cleaned on a gentle 30C cycle, dried flat and pressed with a steam iron before reassembly.