Are Stick on Wall Tiles Worth It for Kitchens and Bathrooms
By Sarah Jenkins (BIID Associate Member | BA (Hons) Interior Architecture, Chelsea College of Arts) | October 24, 2026 | 9 min read
Editorial & Affiliate Disclosure: LUMAA HOME is reader-supported. Our editors independently research, test, and specify every material and product featured. When you purchase through retailer links on our site, we may earn an affiliate commission at no extra cost to you, in accordance with UK ASA guidelines.
The Honest Truth About Stick on Wall Tiles
Hiring a tiler in the UK right now is expensive. Between paying day rates of three hundred pounds, buying bags of powdered adhesive and dealing with tile cutters grinding on the patio for three days, a small kitchen splashback can easily turn into a massive job. If you live in a rented house or flat, taking a hammer and chisel to the landlord walls is out of the question.
That is why stick on wall tiles have exploded in popularity over the last few years. The idea sounds great: buy a few boxes, peel off the paper back and press them straight onto the wall over a rainy Saturday afternoon. No mixing buckets, no messy grey grout smeared everywhere plus no waiting days for mortar to dry.
Yet almost everyone asks the same question before buying: do stick on kitchen wall tiles actually look good in person, or do they look cheap and tacky? Having tested them on multiple budget revamps, the answer depends entirely on the type you pick, the condition of your walls and how carefully you stick them down.
Do Stick on Wall Tiles Look Cheap in Real Life?
Ten years ago, peel-and-stick tiles looked pretty grim. They were thin vinyl stickers with flat pictures of tiles printed on them. The moment sunlight hit them from a window, they showed every single lump in the plaster and looked like plastic sticky-back paper.
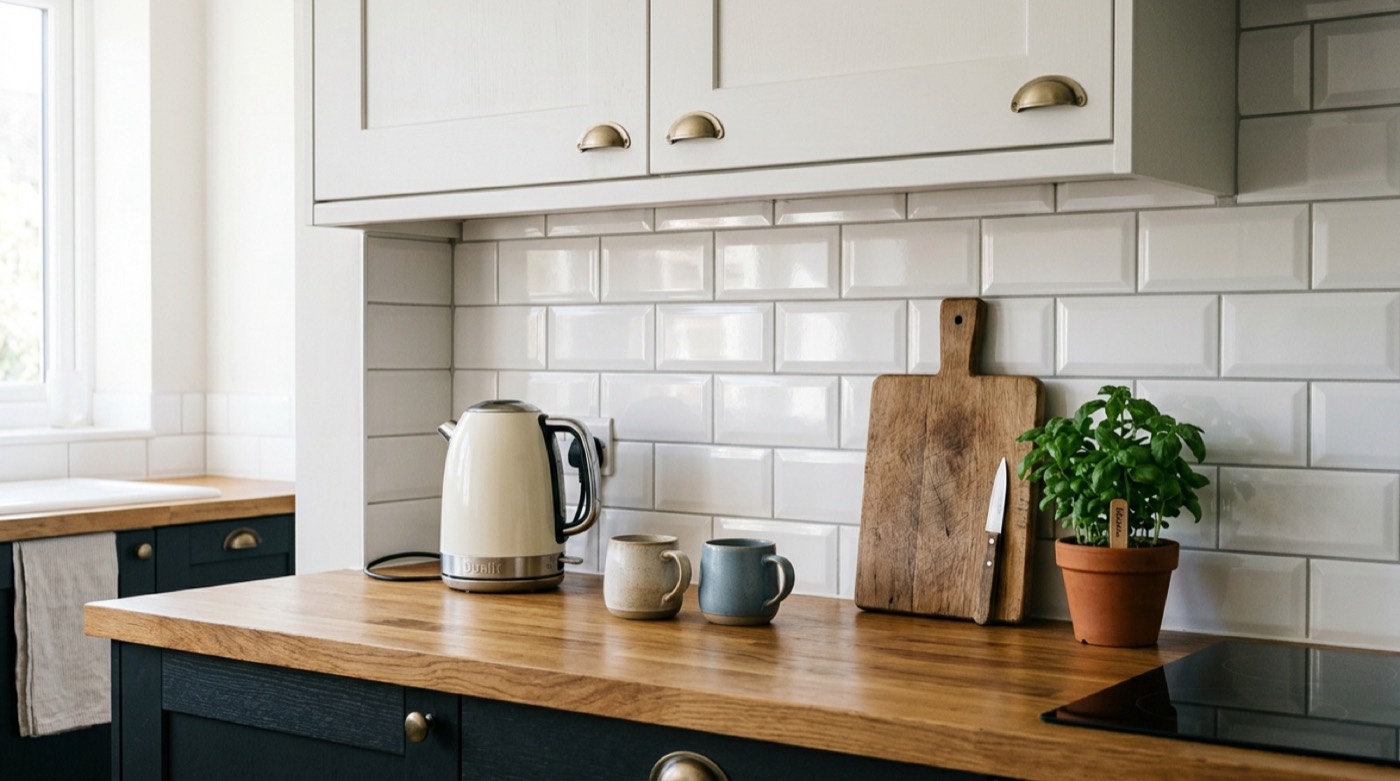
Modern sheets are completely different. The good ones use a thick raised gel layer that mimics the glossy glaze and bevelled edges of real ceramic metro tiles. They have sunken faux grout lines that catch room light just like real cement grout. From normal walking distance across a kitchen, most guests will never guess they are self-adhesive sheets unless they walk right up to the wall and tap them with a fingernail.
When you touch them, you will notice they feel slightly rubbery rather than cold and hard like real kiln-fired clay. That flexible gel surface is actually a benefit because it absorbs small knocks from mugs or pans instead of chipping like ceramic. If you are matching splashbacks with hard-wearing peel-and-stick floors or cupboard refacing films, read our trade breakdown on self adhesive vinyl floor and furniture wraps before picking wear-layer grades.
Where They Work Best Inside a British Home
You can use stick on wall kitchen tiles in plenty of rooms, but you have to be sensible about moisture and heat exposure.
Kitchen Splashbacks Above Sinks and Worktops
The primary spot for kitchen stick on wall tiles is the splashback run between your worktop and upper cupboards. They do a brilliant job catching coffee splashes, washing up water and stray pasta sauce. You can wipe tomato puree straight off them with a damp microfibre cloth and warm soapy water.
When selecting craft kitchen worktops, keep in mind that timber and laminate surfaces move slightly with changing seasons. Leave a couple of millimetres gap between your worktop upstand and the bottom row of stick on tiles for kitchen walls. Run a clean bead of silicone along that junction to keep water from sneaking underneath.
Downstairs Toilets and Cloakroom Basins
Downstairs cloakrooms are usually tiny, plain spaces that cry out for character. Adding a two-row splashback of bathroom stick on wall tiles behind a small hand basin takes under two hours and completely changes the feel of the room. Because cloakrooms rarely get filled with heavy shower steam, the adhesive backing stays firmly stuck for years without any hassle.
Where You Should Never Fit Stick-on Sheets
There are two places where kitchen wall tiles stick on will fail. The first is inside an enclosed shower cubicle. Daily pressurized water jets from a shower head will eventually force water past the seams, turning the glue soft and slimy. Stick to real porcelain or waterproof shower wall panels for wet zones.
The second danger zone is right behind an open gas hob. Building rules require at least 200mm of clearance between open gas flames and any vinyl or plastic wall product. If a hot frying pan sits on a back burner, the heat will warp and melt your tiles in minutes. Fit a stainless steel plate or glass panel behind the gas burners first, then tile around it.
Are Stick on Wall Tiles Waterproof or Is It Just Marketing?
You will often see stick on wall tiles waterproof printed across packaging. That claim is half true. The clear gel surface on the front of the tile is completely waterproof. Water simply beads up on it and runs down the wall.
The real weak point is the joint where sheets meet and the outer edges. If water pools along the edge of a tile, it slowly creeps behind the backing paper. Once moisture gets between the glue and your plaster, the bond softens and the corner pops forward.
If you plan to use stick on wall tiles for bathroom splashbacks, you must seal every open edge with sanitary silicone. Run a thin, neat line of clear or white silicone along the sink rim, up both sides of the tiled panel and along the top edge. That locks out steam and splashing water, keeping the adhesive bone dry.
Buying from High Street Retailers in the UK
You do not have to order blind from random online sellers. Major UK homeware shops now stock good ranges in their decorating aisles.
What to Look for at The Range, B&Q and Dunelm
Picking up stick on wall tiles the range, B and Q or Dunelm is handy because you can touch the tile before spending money. Look closely at the sample packs on the shelves. You want tiles with an overlapping edge lip so each sheet locks neatly into the next without leaving visible gaps.
Check how stiff the sheet feels. Good tiles feel weighty and flexible without feeling flimsy. Look for packs that state they use 3M adhesive or heavy-duty acrylic glue. Avoid paper-thin sheets that bend like cardboard, as those will show every bump in your wall.
Checking Batch Numbers and Buying Spare Packs
Just like paint and wallpaper, peel-and-stick tiles come in production batches. Two boxes with the same name can have slightly different white tones or darker faux grout if made weeks apart. Always check the batch number printed near the barcode and make sure all your boxes match.
Buy one extra pack beyond what you measured. You will almost certainly make a mistake on your first socket cut or miscalculate a corner. Having three or four spare sheets left in a drawer also means you can easily replace a damaged tile years down the road without retiling the whole wall.
Five Practical Rules for a Professional Finish
Fitting these tiles is not difficult, but skipping basic steps leads to wonky lines and peeling corners.
Rule One: Clean with Sugar Soap, Not Washing Up Liquid
Wiping your wall with Fairy liquid leaves a thin slippery film behind that ruins tile glue. Buy a bottle of liquid sugar soap from a hardware shop, mix it with hot water and scrub the wall hard with a scouring sponge. Rinse with clean water and let the wall dry for a full day before sticking anything down.
Rule Two: Never Trust Your Worktop to Be Level
Kitchen counters in British homes rarely sit dead level, especially in older terraces. If you rest your first tile row directly on an uneven worktop, your grout lines will lean sideways across the room. Use a spirit level to draw a pencil line across the wall and start your first row from that level guide.
Rule Three: Tuck Cut Edges Behind Plug Sockets
Do not try to cut a square hole around your socket faceplate with a knife. Turn off the kitchen sockets at your fuse box, loosen the faceplate screws by a few turns and pull the socket forward. Slide your tile edges behind the plastic plate, screw it back tight and your cuts stay completely hidden.
Rule Four: Use a Metal Ruler and a Fresh Stanley Blade
Plastic school rulers slip and get gouged by sharp utility blades. Use a heavy metal safety ruler on an old chopping board or cutting mat. Score the tile twice with a fresh Stanley blade and snap the sheet cleanly along the line for crisp edges.
Rule Five: Pull Boiling Kettles Away from the Wall
A fast-boiling kettle shoots a plume of hot steam at ninety-five degrees straight up the wall. That heat softens tile adhesive and causes nearby corners to curl. Keep your kettle and toaster pulled forward four inches from the tiles to protect the glue.
Removing Them Without Losing Your Tenancy Deposit
The biggest worry for renters is whether pulling these tiles down will rip off the landlord paint or damage the plaster skim.
The Hairdryer Trick for Clean Removal
If you try to rip cold tiles off the wall with your fingers, you will pull paint and paper with them. Warm the surface first with a hairdryer on medium heat for thirty seconds. The heat softens the glue, letting you peel the sheet down slowly at a forty-five degree angle without tearing the wall.
Clearing Sticky Residue from the Paint
Any gummy glue left behind on the wall wipes away easily with a cloth soaked in white spirit or rubbing alcohol. It dissolves the glue residue in seconds without harming sound paintwork underneath. Give the wall a quick wash with soapy water afterwards and nobody will ever know tiles were there.
Frequently Asked Questions
Can you put stick on wall tiles over old existing tiles?
Yes, they stick firmly to old ceramic tiles as long as you scrub the old surface with sugar soap first to remove kitchen grease and limescale. If your old tiles have very deep grout lines, fill them smooth with ready-mixed wall filler so the new flexible sheets do not dip into the grooves.
Are stick on wall tiles safe to use behind a gas hob?
No, vinyl and gel stick-on tiles should never sit within 200mm of an open gas burner flame. Heat from gas burners melts the gel surface and creates a fire hazard. Fit a stainless steel or toughened glass panel directly behind the hob first, then tile around it.
Will bathroom steam make stick on wall tiles peel off?
Steam will lift the corners if the outer edges are left unsealed. While the tile face sheds water easily, steam can creep into open edge seams. Seal the outer perimeter and the sink junction with anti-mould sanitary silicone to keep moisture away from the glue.
How do you get clean cuts around double plug sockets?
Turn off the kitchen sockets at your fuse box, loosen the faceplate screws by a few millimetres and pull the socket forward. Cut your tile so the edges tuck behind the plastic faceplate, then screw the plate back down tight to hide all raw cuts.
How long do stick on wall tiles last in a busy home?
Good quality gel tiles fitted over clean, grease-free walls typically last between three and five years. Sealing the edges with silicone and keeping boiling kettles pulled away from the wall stops the adhesive from loosening early.
How do you remove stick on wall tiles without damaging paint?
Warm the tile with a hairdryer on medium heat for thirty seconds to soften the adhesive, then peel it away slowly from the top corner. Wipe any leftover sticky residue off the wall using a cloth dampened with white spirit or rubbing alcohol.